

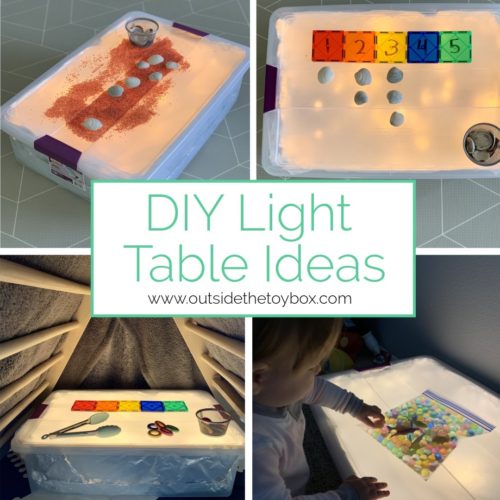
For the longest time, I wanted a light table. I wanted one to use in my classroom and then I wanted one to use at home with my little one. There are so many beautiful play and sensory ideas using light tables, but they always seemed way out of reach financially.
I had seen many people online and people I know in person make their own, but I always thought it would be harder than it actually was or that I would need some fancy materials.
So, when I was emptying a bin of stored clothes for Ruby, I realized that the storage container itself would make a perfect light table. I had seen people use clear storage for light tables before, but honestly I didn’t believe it would work.
How could something so easy turn out so perfect? Well, I am here to encourage you to try this DIY. It is so quick and easy to make if you have all the supplies. If you don’t already have all the supplies, they are super affordable to get.

Disclosure: This post may contain affiliate links, which means we may receive a commission if you click a link and purchase something that we have recommended. While clicking these links won’t cost you any extra money, they will help us keep this site up and running! Please check out our disclosure policy for more details.
Here is what you need
- Clear storage container (I used a 32 Qt. Sterlite Storage container)
- Foil
- Wax paper
- Tape
- Battery-operated lights
That’s it! You probably have half of those materials already.

Here is how you make it
- First, line the bottom with foil and tape down the edges.
- Next, line the lid with wax paper and tape that down.
- Place the battery-operated lights inside.
- Secure the lid and voilà!
There you have it, a super quick and easy DIY that doesn’t require any power tools.
here are my thoughts on this DIY
There are pros and cons to any DIY project. I tend to try out the super frugal options that don’t require power tools. I have created some cardboard toys, some of which are still in our toy rotation. If you haven’t seen my post “4 Super Engaging Cardboard DIY Projects for Toddlers” you should check it out HERE.
There are definitely some pros and cons about this DIY Project. I love how easy and affordable it was to create. The wax paper is essential to disperse the light giving that true light table look. The foil also helps to reflect the light. I had two tiny twinkly light strings and one of them was out of battery. I have found that even with one mini twinkly light string there is still enough light. The size of the light table has worked well for my toddler. I imagine that it would also work well for an older child if you placed it on top of a coffee table or low shelf.
So, although this was super easy and affordable to create, I can see the draw to the professionally created light tables. It is not perfect by any means. I had a storage container that did not have a flat lid, so there are some ridges on the top and it doesn’t make for the best playing surface.
It is also not super durable. It is definitely durable enough for my toddler to climb on and it has lasted us a few months already, but it can easily be moved, lifted, tipped, etc. My toddler also always wants to lift the lid to get to the lights.
So, overall I think for the ease and affordability it definitely gets us by, but maybe someday I will invest in a professionally made light table or beg my dad to use his power tools to make something super cool and durable.
If you are not too into the idea of DIY, but love the idea of a light table then I found these awesome ones on Etsy. Check them out by clicking the images below:

Ready Set Play Large Light table

Ready Set Play Small Light table
Play Me Creations light table and Sensory Box

WndrOne Light Table with adjustable height
So, once you have a light table what are you supposed to do with it?
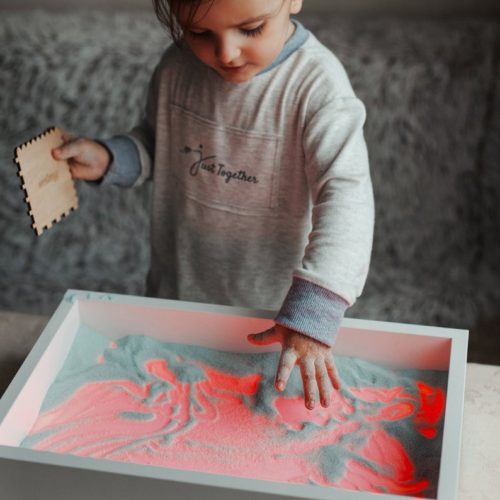
I personally love the light table for the seemingly boundless opportunities for open-ended play and exploration. So many great color, light, sorting, counting, shapes, shadows, reflection, and other STEM provocations could be created using the light table.
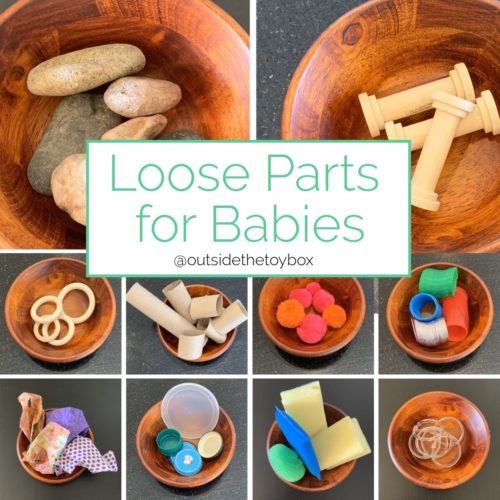
My suggestion is to use loose parts for open-ended exploration. Make sure to check out my posts for more information on loose parts play:
Loose Parts for Infants and Toddlers
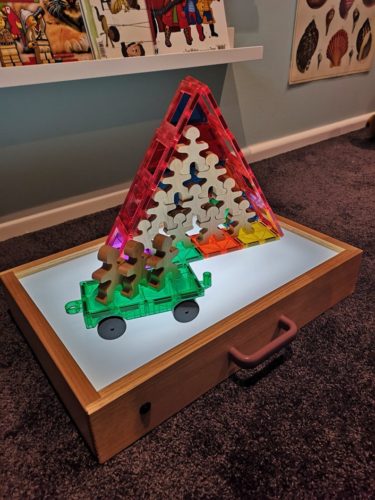
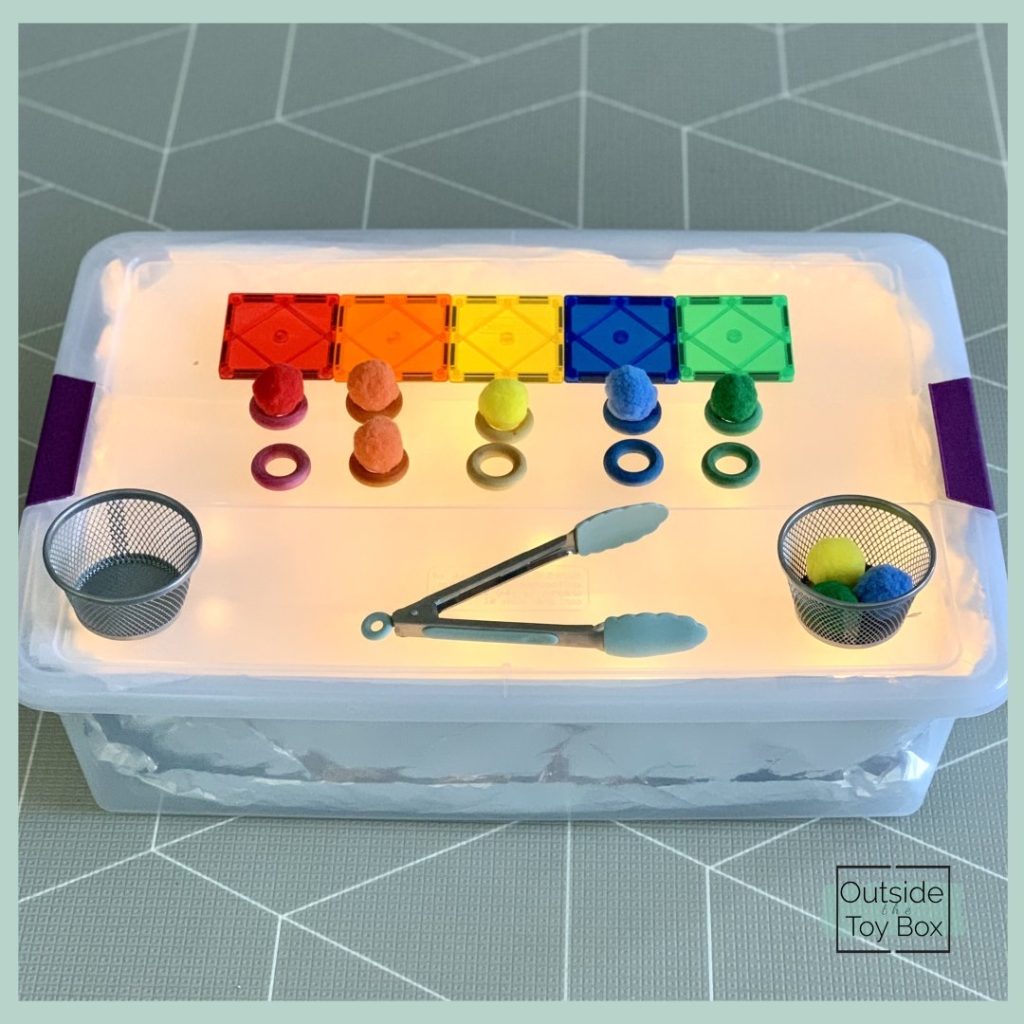
Translucent materials make a great addition to light tables because they offer properties to explore color and light. Ruby loves to use the magnet tiles (we have Tytan Tiles that we found at Sam’s Club for $20). She loves to look through the magnet tiles to see the different colors.
Here are some great translucent loose parts that you may want to check out:

Reggio Baby Clear Sensory Pouches
Etsy.com

Aspiring Tots 99 Pc Translucent Loose Parts
Etsy.com
Some other material ideas include:
- Translucent gems
- Translucent blocks
- Legos/Duplos
- Sand
- Playdough
- Colored water in cups or containers
- Waterbeads
- Bubble wrap
- X-rays
- Nature items
- Cellophane
- Translucent cups
- Pom poms
- Scarves
- Sensory bags or bottles (colored hair gel or oil and water are great ones)
- Reusable ice cubes
- Tissue paper
- Tracing paper
- Cookie cutters
- Mirrors
- And so many more!
Subscribe to receive a FREE list of 100 Loose part ideas
We will send you updates, but promise never to spam you. Unsubscribe at any time.
Then once you have those materials, how do you use them?
Here are some ways to use the light table with toddlers or preschoolers:
- Color exploration
- Color sorting
- Color mixing
- Reflection and symmetry
- Shapes
- Fine motor activities
- Counting
- Sorting
- Tracing numbers, shapes, lines, or letters
- Building
- Small world play
- Sensory bag search and find
- X-ray matching to cards or objects


Let me know how you use your light table in the comments below.
Be sure to follow us on Facebook, Instagram, and Pinterest to get daily play inspiration.

Share on facebook
Share on pinterest
Share on email
Share on print
Please help to support my blogging efforts by sharing this post to others who may find some value in its contents.
Subscribe to Stay up to date
We will send you updates, but promise never to spam you (who has time for that?)
Follow us on Social Media to get daily play inspiration.
Trackbacks/Pingbacks